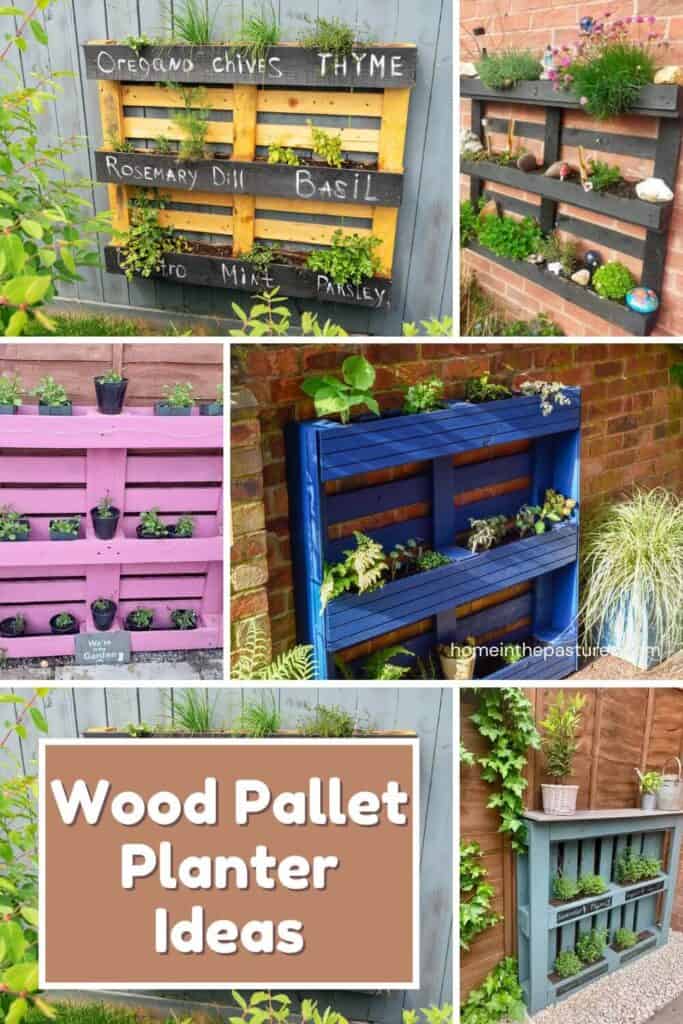
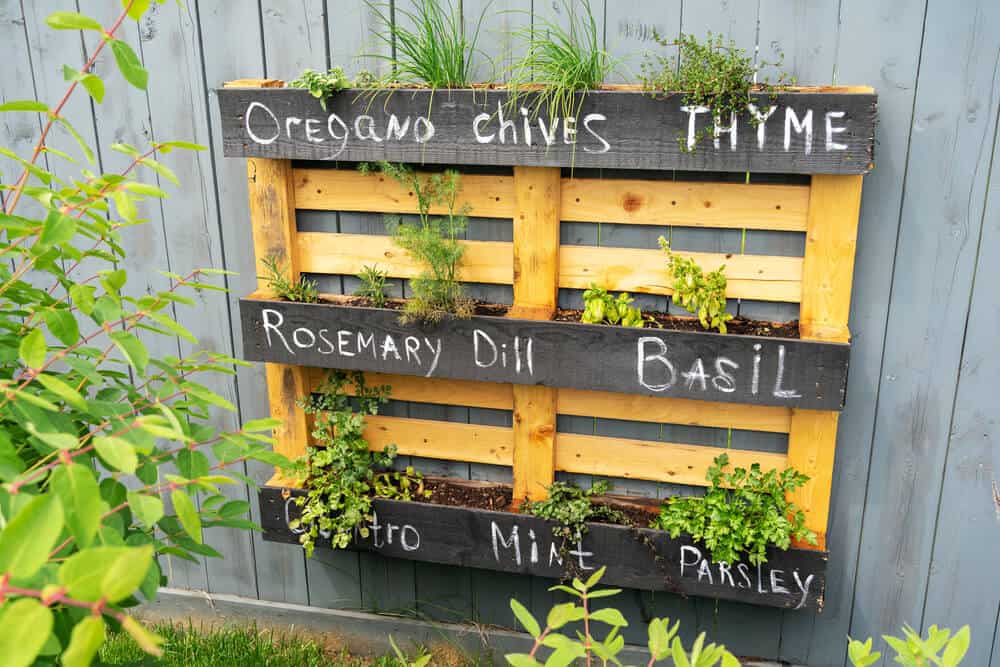
Old wooden pallets, honestly, they’re way too useful to just toss out! With a bit of vision, you can turn them into practical, good-looking planters that fit right into any garden or outdoor nook. Simple pallet planter ideas are a wallet-friendly way to upcycle unwanted wood into one-of-a-kind containers for flowers, herbs, or even some veggies. If you’ve got a couple of tools and a pinch of creativity, you can whip up something eye-catching that matches your vibe.
From vertical wall planters to chunky pallet boxes, there’s something that works for balconies, patios, or sprawling gardens alike. People seem to love how you can tweak pallet planters to your own taste!
So, whether you’re squeezing greenery into a tight spot or just want a hands-on, eco-friendly project, playing around with pallet planter ideas might just spark your next DIY obsession.
Getting Started With Pallet Planters
Building a pallet planter doesn’t need to be complicated. First, hunt down a decent pallet and check it’s safe and solid, then gather your essential tools. Taking care with the basics means your planter will actually last and keep your plants happy over time.
Choosing The Right Pallet
Not every pallet is a winner. Look for one stamped “HT” (heat-treated). Those are safer for gardens than the ones marked “MB” (methyl bromide), which are chemically treated. Nobody wants chemicals leaching into their food or flowers, right?

Give the pallet a once-over for splinters, weird stains, or bug damage. Solid, clean wood holds up better and won’t fall apart on you. If you can snag a hardwood pallet (oak or maple, for example), even better -they shrug off rain and damp much longer than pine or other softwoods.
Honestly, it’s worth asking at local businesses, in your local Facebook groups or garden centres if they’re giving pallets away. Just double-check the pallet wasn’t hauling chemicals before you grab it, no sense risking your plants!
Preparing And Treating Pallets
Prep work matters. Yank out any stray nails, staples, or sharp bits with a hammer or crowbar. Sand down the whole thing, medium-grit sandpaper works. So you don’t get splinters every time you move it.
Give the pallet a good scrub with warm soapy water to get rid of grime or mold. Let it dry out fully; you don’t want trapped moisture rotting the wood from the inside. If it’s going to live outdoors, slap on a coat of non-toxic sealant or natural oil. For edible plants, make sure whatever you use is food safe. Check for any hidden gunk or bugs tucked into corners. A little extra effort now saves you hassle later.
Materials And Tools Needed
You’ll need more than just the pallet, obviously. Usual suspects: handsaw or jigsaw, hammer, crowbar, gloves, sandpaper. For putting it all together, wood screws and a drill (or screwdriver, if you’re feeling old-school) are key.
Don’t forget eye protection and a dust mask – sawdust is no joke! Here’s a quick rundown:
| Tool/Material | Purpose |
|---|---|
| Hammer & Crowbar | Disassembling wood |
| Saw (hand/jigsaw) | Cutting boards |
| Sandpaper | Smoothing surfaces |
| Drill & Screws | Assembly |
| Gloves & Eyewear | Safety |
| Non-toxic sealant | Weather protection |
Depending on your design, a tape measure, spirit level, or some landscaping fabric could come in handy too. It’s way less frustrating if you lay everything out before you start.
Simple DIY Pallet Planter Ideas
Pallets are a goldmine for budget-friendly, creative planters, especially if you’re working with a small space or just want to experiment. With a few tools and some leftover wood, you can whip up something that actually looks great – herbs, flowers, veggies, whatever you fancy.

Vertical Pallet Planters
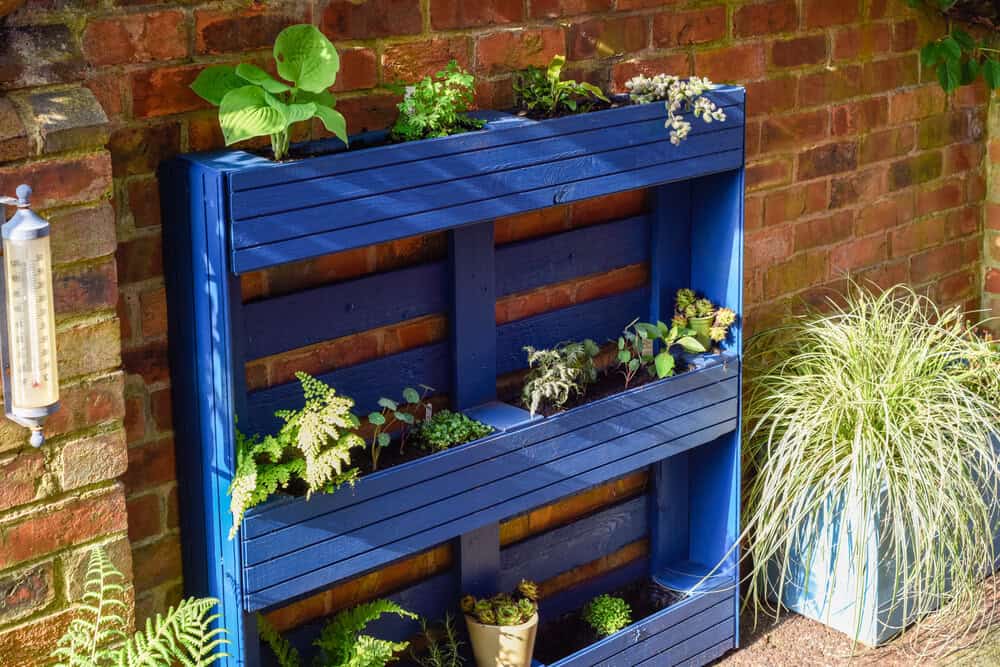
Vertical planters are a lifesaver for cramped spaces or sunny balconies. Basically, take a pallet, clean and sand it, stand it upright, and cover the back and sides with landscape fabric or plastic. This keeps the soil in without making the whole thing too heavy.
Fill the pockets with compost and tuck in trailing flowers, lettuces, or succulents. These planters usually get anchored to a wall or fence so they don’t tip over. Watering often is a must. Vertical setups dry out faster than garden beds. Herbs and greens do especially well here, since their roots don’t need much depth.
Horizontal Pallet Garden Beds
If you’ve got a bit of ground to play with, horizontal pallet garden beds are super straightforward. Just line the top of the pallet with weed membrane, fill it with compost, and plant between the slats. The frame keeps soil in place and makes neat rows for planting.
Great for strawberries, salads, or bedding plants. Stack two pallets if you need extra soil depth for roots. Horizontal beds are low-maintenance – the separated rows keep weeds down and your plants organized.
Mini Herb Pallet Planters
Short on space? Mini herb pallet planters are your friend. Cut the pallet into smaller chunks, and each one becomes a slim, multi-pocket planter. Line the inside with plastic to help with moisture and protect the wood.
Basil, parsley, chives – you name it! Grow happily in these little planters. Chalkboard paint or cute tags help you remember what’s what. They’re light enough to move around for sun or even bring inside if the weather turns grim.
Wall-Mounted Flower Displays
Want to jazz up a boring wall or fence? A chunk of pallet fixed vertically does the trick. You get open pockets between slats. Perfect for annuals, pansies, or tough little perennials.
Pick a spot that matches your plants’ sunlight needs. Drip irrigation hoses are a smart add-on if you’re planting somewhere sunny and don’t want to water constantly. Wall-mounted pallet planters are a sneaky way to layer plants and save precious ground space, making any dull wall a bit more cheerful.
Creative Upcycling Techniques
Pallet planters are kind of a blank canvas. You can go wild with color, quirky details, or by mixing in other recycled stuff. With a little effort, you can turn a basic pallet into a real focal point for your garden or patio.
Colourful Painted Pallet Planters
A fresh coat of paint can totally change the vibe. Weatherproof paint in bold colors makes the planter pop and shields the wood from rain or sun.

Masking tape is handy for crisp lines or patterns. stripes, geometric shapes, or even stencilled designs. Some folks go for bright, playful colors, while others stick to soft pastels for a cottagey feel.
For the best finish, sand before you paint and seal with clear varnish. That way, the color sticks around longer and it’s easier to wipe clean. A roller gives a smooth look, but honestly, a brush adds a bit more personality.
Adding Decorative Features
It’s the little touches that make a pallet planter stand out. Hooks or shelves can hold extra pots, lanterns, or wind chimes – whatever feels right!
String up some solar fairy lights for evening atmosphere. Chalkboard paint gives you a spot to note plant names or care reminders.
You could also glue on house numbers, tiny mirrors, or bits of colored glass. Lightweight metal art, mosaic tiles, or even a patch of fake grass can add texture and interest without making things look cluttered.
Incorporating Recycled Pots
Old bottles, tin cans, or terracotta pots? Don’t toss them. Attach them to the pallet with wire or clamps and you’ve got instant planting pockets. Mixing shapes and sizes lets you grow a wider variety of plants in one spot.
Using recycled containers is good for the planet and your wallet. Cut them down, drill for drainage, and paint to match or contrast with your main planter.
Play around with heights for a layered look, or group similar colors for a more coordinated feel. Just check for sharp edges and make sure everything’s fixed tight. You don’t want pots falling off in the wind!
Maximising Small Spaces With Pallet Planters
Pallet planters are a clever way to squeeze greenery into awkward corners or tight spots. By going vertical or hugging a wall, you can fit a surprising amount of plants where regular pots just wouldn’t work.
Balcony Pallet Planter Solutions
Most balconies are short on space, but vertical pallet planters can help. Attach a pallet to the wall or railing, and you’ve suddenly got a bunch of pockets for herbs, flowers, or succulents – no floor space needed.
Lining the back with landscape fabric improves drainage and keeps things tidy. Stick to a simple watering routine, maybe a small can or watering spikes. Since the top pockets dry out fastest.
Annuals or compact veggies like lettuce are great for sunny balconies. Try mixing shade-lovers and sun-lovers if your space gets a bit of both. A splash of weatherproof paint adds style without eating up space.
Slimline Patio Designs
For patios, slimline pallet planters sit right up against fences or walls. They don’t hog space but give you plenty of room for trailing plants, strawberries, or shallow-rooted veggies.
If you want to get fancy, pull out a few slats or space them differently for staggered plant heights. Hooks or shelves on the sides can hold tools or a few decorative extras.
Raise the planter slightly on bricks or pavers to keep the wood dry. Prune and move pots around as needed to keep things neat and lively. It’s a tidy way to keep your patio green without tripping over pots everywhere.
Choosing Plants For Pallet Planters
Picking the right plants comes down to your space, the sun, and honestly, what you want your garden to feel like. Compact varieties, tough flowers, and trailing plants usually thrive in pallets’ little pockets and vertical setups.
Edible Herbs And Vegetables
Pallet planters are a great fit for growing herbs and some compact vegetables. Herbs like basil, parsley, thyme, and chives seem to love the shallow soil you get with pallets. They don’t need much root space, and they stay pretty tidy. If you like tossing fresh flavours into your food, this setup couldn’t be much easier.
Salad greens such as lettuce and spinach work well when sown right into the pallet’s gaps. Radishes are surprisingly good for vertical planters; they’re speedy and don’t need a ton of room. Strawberries? They’re neat little growers in horizontal pockets and can give you a handful of fruit without much fuss.
If you want the best results, stick with varieties meant for containers or those that just naturally keep it small. Water regularly and give them a sunny spot – they’ll reward you all season long.


Low-Maintenance Blooms
If you’re after colour without the headache, pallet planters are happy homes for tough annuals or small perennials that don’t mind shallow soil. Marigolds, pansies, and violas all tuck nicely into those little spaces and aren’t too demanding. Just the odd deadheading and they’re good.
Succulents are another go-to if you’re not keen on constant watering. Their shapes are fun, and they barely need any attention. Honestly, “set and forget” is the vibe here. Just don’t cram in too many, compact types are best so everything gets some light.
Here’s a handful of solid options:
- Marigolds
- Alyssum
- Sedum varieties
- Violas
Try to group plants with similar needs. It just makes life easier for you and them.
Trailing And Cascading Plants
If you want a bit of drama, trailing varieties spilling over the pallet edges do the trick. Petunias, lobelias, and ivy are classics. They’ll turn a plain pallet into something pretty lush before you know it. These types really shine on the top or outer edges of a vertical planter.
For something edible, nasturtiums bring colour and you can eat the flowers and leaves too. Creeping Jenny (Lysimachia nummularia) is tough and throws out a bright green cascade.
Stick trailing plants up high or around the outside so their vines can do their thing. Just a heads up, they might need a little extra water in summer since their roots are more out in the open.
Easy Pallet Planter Maintenance
Keeping pallet planters happy mostly comes down to checking water, making sure they drain, and giving them a quick once-over as the seasons roll by. A bit of routine care goes a long way to keep both plants and pallets in decent shape.
Watering And Drainage Tips
Pallet planters dry out faster than regular garden beds, especially when it’s hot. Water them well, but don’t drown the roots – no one likes soggy feet! Early morning or late afternoon is usually best; otherwise, half your water might just vanish into thin air!!
A watering can with a rose attachment is handy for a gentle, even soak. Tossing a layer of mulch on top helps keep things cool and moist under there.
Check for drainage holes at the bottom. If water’s pooling, grab a drill and add a few more holes – about 15 cm apart is good.
Quick checklist for watering and drainage:
- Water deeply, but let excess escape
- Mulch helps hold onto moisture
- Clear out drainage holes now and then
- Adjust if you spot soggy patches or dry zones
Seasonal Care Guide
Pallet planters need a bit of a different touch as the year goes on. In spring, a top-up of compost and some slow-release fertiliser gives everything a boost. Take a look at the wood for any rot or wobbly boards, tighten or swap out if needed.
Summertime means checking moisture daily and watering more when it’s dry. Keep an eye out for pests like slugs or aphids – hand-picking or natural fixes usually do the job.
Come autumn, clear out old plants and leaves so things stay neat and you’re not inviting mould or critters. In winter, if you can, move the planter somewhere sheltered or toss on some garden fleece to keep out the frost. A yearly coat of wood preservative helps pallets last longer, too.
Troubleshooting Common Pallet Planter Issues
Pallet planters are a practical, sustainable choice, but yeah, they’ve got their quirks. Most headaches can be avoided with the right prep and a little regular attention.
Preventing Rot And Decay
Wooden pallets, especially untreated ones, don’t always hold up well to moisture. To dodge rot, look for heat-treated pallets marked “HT.” They’re less likely to soak up water. A good non-toxic wood sealant or outdoor preservative is worth the effort for keeping water out and extending the life of your planter.
Check for soft or dark spots in the wood every so often so you can catch problems early. Lining the inside with landscape fabric or a plastic liner (make sure it has drainage holes) helps keep the wood from staying wet all the time. Lifting the pallet up on bricks or blocks improves air flow underneath and keeps water from pooling.
Just keep an eye out for any signs of fungus or mould and deal with them fast. If a section goes soft or crumbly, swap it out before it spreads.
Avoiding Pest Problems
Pallet planters can attract a few unwanted guests, slugs, snails, ants, even the odd wood-borer. Keeping the area weed-free and clear of debris cuts down on hiding places. A sprinkle of crushed eggshells or horticultural grit on the soil is a pretty effective slug deterrent.
Ants and woodlice? Try a dusting of cinnamon or diatomaceous earth at the base. It’s not foolproof, but it helps. Give the corners and undersides a quick check now and then for spider webs or insect eggs – better to catch them early.
If you spot insects boring into the wood, a natural spray made from neem oil or soapy water usually does the trick. Staying tidy and clearing out any overripe fruit or rotting plants really helps cut down on pest magnets and keeps your pallet garden healthier overall.
Showcasing Your Pallet Planter Creations
Showing off your pallet planter creations can genuinely transform a garden, patio, or balcony into something both useful and eye-catching. The way you arrange them, and honestly, a bit of creative lighting, can really make these DIY pieces pop and feel welcoming.


Arranging Multiple Planters
Grouping several pallet planters together lets you get creative with layouts and squeeze more out of your space. Sorting by plant type, herbs in one, flowers in another, makes care simpler and keeps things organised. Vertical stacking, whether you lean pallets against a wall or build multi-level stands, is a clever way to save room in tight spots.
Mixing up heights and angles keeps things visually interesting. Here’s a quick table for inspiration:
| Arrangement Style | Best For | Key Benefit |
|---|---|---|
| Side-by-side | Large spaces | Easy access, neat look |
| Vertical stacking | Small patios, balconies | Space-saving, bold display |
| Scattered grouping | Informal gardens | Natural, relaxed atmosphere |
If you add wheels to your pallets, moving them around is a breeze. handy for chasing the sun or just mixing things up. And getting the spacing right? That helps with airflow, which is good news for plant health and cutting down on disease.


Incorporating Lighting Features
Lighting really brings out the shapes, colours, and textures of pallet planters once the sun goes down. Solar-powered string lights can be tucked through the boards or just draped casually along the edges, gentle, warm, and honestly, you barely notice the energy use. If you’re after something a bit more eye-catching, try popping LED spotlights at the base; they’ll throw dramatic shadows and make those taller plants look almost theatrical.
Mason jar lanterns or battery fairy lights? Always a win for a cosy, welcoming vibe. Plus, they’re practical. Who doesn’t want to see their guests (or their food) during an evening get-together? Just don’t forget: weatherproof lighting is non-negotiable if you want it all to survive the British weather.
Top tip: Screw in a few little hooks or clips straight onto the pallet wood. Makes hanging lanterns or string lights easier. A bit of creative lighting goes a long way, turning those planters into a proper night-time feature and letting you enjoy them long after it gets dark!
Do you have any simple pallet planter ideas? I’d love to hear them!